
Become a craft brewer immediately.
Why Did I Write This Guide?
I put off home brewing for years because I assumed it was tough and that I’d make bad beer. Once I started, I couldn’t believe what I had been missing out on. If I had a guide like this early on, I would have started brewing craft beer so much sooner.
This guide is approachable.
I’ve stripped the jargon so you can focus on learning everything you need to get brewing in your kitchen. If you’re interested in brewing and have been holding off, I want to change that. I want to help you become a crafter brewer!
Who Is This Guide For?
It’s for everyone who has put off learning to brew because it seemed intimidating.
If you want to get started brewing without having to read a 300-page book, you’ve come to the right spot.
Together, we’ll cover the basics of what you need to know to get started, including tips and tricks to make your first brew day a breeze.
This guide is actionable. By the end of it, you’ll be ready to order your equipment and ingredients. You’ll be ready to start brewing right away. I’ve compressed years of brewing experience into seven short sections. You will gain an understanding of the whole art of brewing if you read this from start to finish.
What’s Covered in This Guide?
Here’s how we’re going to take you from beer-lover to beer-crafter in seven chapters:
- Ingredients – What is beer and how do we make it?
- Batch Sizes – Why our first brew will be a small-batch, one-gallon brew
- Equipment – What you’ll need to get started without spending a fortune
- Sanitization – The single biggest thing you need to worry about
- Brew Day – How we get the magic started
- Fermentation –Why your mother taught you that patience is a virtue
- Bottling – When the waiting game really begins
SIMPLY PUT, USE THIS GUIDE TO BECOME A CRAFT BREWER IMMEDIATELY.
1. Ingredients
Let’s learn about the ingredients that make up our favourite nectar of the gods.
What is Beer, anyway?
I know this probably sounds pretty basic, but to become craft brewers, we need to understand our craft in its most basic form. Beer is a living and breathing piece of art (more on this when we cover fermentation in section 5. Before we can create our own biological masterpiece, however, we have to understand beer’s basic DNA. By doing so, the art of making beer will make a lot more sense. And we’ll have a point of reference to rely on as we improve our brewing skills.

What is beer made of?
To answer this, we can look to the Germans for inspiration. You may have heard about Germany’s famous Beer Purity Law, or Reinheitsgebot. Dating back to the 16th century, it declared that the only ingredients that could be used in the production of beer were water, barley, and hops.
I won’t bog us down in the history of why such a law existed (has government ever met an industry it hasn’t wanted to regulate?), but you may have noticed it failed to mention the most important ingredient of all: yeast!
That’s because in the 16th century, we didn’t know that yeast played a critical role in the fermentation of beer. Brewers would use sediments from previous batches (which unbeknownst to them contained the yeast), or they would let the beer sit out until wild yeast took over and did their thing. You can thank Louis Pasteur for discovering the role of yeast in fermentation in the 1800s.
Of course, most of us have enjoyed plenty of craft beers that have had more than these four main ingredients. However, for the purposes of understanding beer’s basic DNA, these are the four ingredients we need to understand at the outset. So let’s explore these further.
Water

Water is the beer’s body
By volume, this is the biggest ingredient in any batch of beer. Give or take, water makes up 90-96% of any beer recipe. Given this, you’re going to want to use water that tastes good.
As you become an advanced brewer, you may explore methods to alter the water (adding minerals, for instance), or sourcing spring water to give your brew a unique taste, but we’re not there yet. For now, if your tap water is drinkable, it’s brewable.
For just about all of us in North America, our local water supply will do the trick just fine. However, if your water supply is known to have large amounts of sulfur, iron, or bicarbonates, then you’ll want to use bottled water. Ditto if you find your water has a chlorine taste. Otherwise, if it tastes fine, it brews fine.
Malt
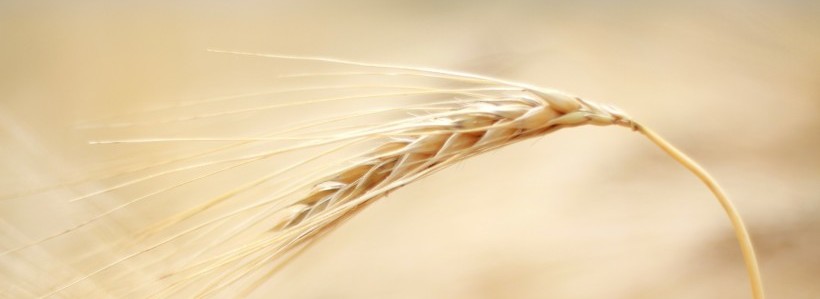
Malt is the beer’s soul
We get most of our fermentable sugars from barley. Barley looks a bit like wheat, but when we’re making beer, we use barley that has been processed for brewing.
Specifically, we use malted barley.
This means that a maltster has steeped the barley at specific temperatures under strict conditions to get the grains to sprout. The grains are then dried before any further growth occurs. This process develops sugars and starches that we’ll eventually extract when we make our beer.
Each recipe will be different, but you’ll be using around 2 lbs of malted barley or grains in most 1-gallon recipes. Obviously that will change depending on the style. But before you use it, it has to undergo one more step: milling (crushing).
Most local homebrew shops will mill your grains for you and many online suppliers will sell them to you pre-milled. If neither of those are options available to you, you can always put your grains in a large ziplock bag and crush them lightly with a rolling pin. But if you can get your grains milled, I highly recommend it.
Barley (malt) is the soul of your beer. Too often, we overlook it’s critical role. I’ve only covered the basics here, but if you want a comprehensive understanding of malt, check out my detailed guide.
Hops
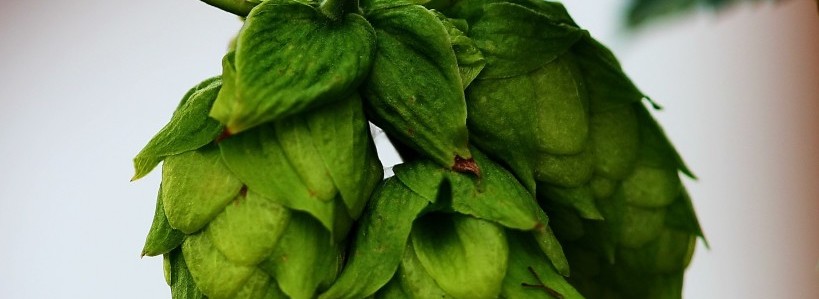
Hops are the beer’s spice
For many a craft beer enthusiast, this is our favourite ingredient. If you’ve never seen a hop plant in the wild (or on a farm), it’s an impressive botanical specimen that can grow to 18 feet if your let it! And the rumours are true, the hop, or humulus lupulus is related to hemp. (Or is it?) We use hops to add bitterness, and often, to add a floral flavour to the beer, both of which act to balance the sweetness of the malt. Hops also have a practical benefit of inhibiting spoilage (hence how the India Pale Ale was invented).
If you want to explore this ingredient in greater detail, I have a detailed guide to understanding hops.
Yeasts
Yeast defines the beer
Whole books have been written about the wonders of yeast. I’ll try and keep this brief so we can get talking about making beer. Yeasts pretty much convert sugars into alcohol and CO2. You can’t have beer without it. Yeasts are actually living microorganisms that love a steady diet of sugar. We’re surrounded by wild yeasts, most of which would not taste particularly good in beer. Thankfully for us, a large variety of beer yeasts have been cultivated, each of which can impart their own unique flavours to our beer. These varieties can be categorized into two types: lager and ale yeasts. Lager yeasts ferment at colder temperatures, and ale yeasts at temperatures closer to room temperature.
How do we make beer?
This is where the fun begins. We have to combine these ingredients in a way that creates the perfect conditions for yeasts to do their thing and ferment a bittersweet liquid into a bubbly, alcoholic treat. We’ll cover this off in greater detail in the coming days, but for now, the basic process is this:
- Convert the malted barley into sugars by soaking them in a hot water bath. The official name for this process is called “the Mash”. In more advanced brewing, you would “sparge” or rinse the grains to extract more sugars, but for our method, we’ll still make awesome beer without sparging.
- Next comes “The Boil.” We remove the grains from the water and bring this sweet liquid to a boil. We’ll add bittering hops and let the whole thing boil for an hour. In some recipes, you’ll continue to add bittering hops throughout the boil. And if you’re using aroma hops, you’ll add them at the end of the boil, once you have shut off the heat. What you’re left with is a solution called “wort.” I know, it’s not the most appealing term, is it?
- We then have to cool the wort to “pitching” temperature. This step is an important one. We can’t take our sweet time bringing cooling our liquid to the temperature needed to add our yeast (usually in and around 20℃ or 68℉). We want to do this in about 30 minutes or less to avoid risks of contamination. This means we’ll add our brewing pot to an ice batch in the sink to cool it quickly.
- Add the yeast (aka “pitching the yeast”) and let it ferment. With the wort at the right temperature, we transfer it to a fermenting vessel (in our case, a 1-gallon glass carboy, which we’ll discuss in more detail later this week), add the yeast to the wort, which in brew-speak is called “pitching the yeast.” Seal the carboy with an airlock, store in a dry, dark, cool spot and let mother nature do her thing.
- Bottle your beer and let it condition. After two weeks, our beer will be ready for bottling. All yeasts will have consumed most of the sugars and converted the wort into flat beer. Of course, we want bubbles! So, we’ll transfer the wort to a bottling bucket with a small dose of sugar and then transfer that new solution to individual bottles. This will allow residual yeast to snack on the sugars and in so doing, carbonate the beer. This process will take at least two weeks, but you’ll probably want to wait 30 days before opening your first bottle.
2. One-Gallon Brewing
How it compares to the larger batch sizes most home brewers start with.
Read just about any intro to home brewing book and you’ll find yourself walking the same path I did when I took up this awesome pursuit: buying all the requisite equipment and ingredients for 5-gallon brewing. It was the easiest way to get started. All the recipes I had access to were scaled for 5 gallon brewing, and since I was so new to brewing, I had no clue I had a choice in the matter. I simply assumed all home brewers were brewing in 5 gallon batches and proceeded accordingly.
But after pouring two consecutive botched brews down the drain, I started asking myself if there was a better way. I can’t imagine how the pros feel when they have to do the same, at much larger scale! It sucked pouring 5 gallons of beer down the drain. That’s when I started looking at 1 gallon brewing as a viable alternative.
I want to cover this topic because as you become a craft brewer, you’ll do what we all do at some point: search the Internet for new recipes only to discover that most are geared towards three types of brewers:
- 5-gallon brewers who use malt extract. As you’ll see later, we’re going use whole ingredients (all-grain) to make our beer. But you can also make beer using malt extract instead of grains. This is probably what most people have in mind when they think of home-brewing…visions of buying buckets of syrup at the local home brew shop, mixing it with hot water then presto, you’re done! It can be a quick way to make beer, but you lose out on the fun part of making beer: crafting your own recipes or brewing your own ales packed with flavour.
- 5-gallon brewers who use a combination of steeped grains and malt extract. This is how I got started, and I should say I got some great results with this method. It’s an intermediate step from extract brewing. You pretty much make an all-grain tea, which is steeped to extract the flavours and colours. You add the malt extract which contributes the majority of the fermentable sugars to the steeped tea and proceed with the boil.
- 5-gallon brewers who use all-grain. All-grain brewing requires a heavy investment in equipment and is slightly more labour-intensive than extract or partial mash brewing. But it’s the granddaddy of home brewing. Most home-brewers aspire to become all-grain brewers. I certainly did; I just had no space for that kind of set-up. And it frankly seemed quite intimidating.
A third way
It took me too long to discover that I actually could get started with all-grain brewing without having to clear out my living room and forking out a lot of money on new gear. I discovered 1-gallon recipes using a method that has become popular with brewers: Brew-In-A-Bag. The process is simple: you steep your grains to extract the sugars, remove the kettle and get going with your boil, as I outlined earlier. Using a grain bag is optional (I’ll cover this off later this week), but the benefits of going small are huge.
Here’s why we’re going to learn to make beer using small 1-gallon batch sizes:
It’s faster than 5-gallon brewing
I can’t begin to tell you how awesome it was the first time I cooled 1.25 gallons of hot wort in an ice bath. I got the wort down to pitching temperature more quickly than I ever could 5 gallons. On average, it takes me 20 minutes to chill the wort down to 20ºC (68ºF). Transferring to the fermentor is also quicker, as is all the clean-up. Sure, I’m not saving hours, but there’s no doubt that small batch brewing is a more efficient process on brew day. The real time-saver, of course, comes on bottling day. When you’re bottling 6 bottles instead of 38 (500ml), you feel the difference right away. Not to mention the fact that you’re not lugging around or cleaning a massive 5-gallon carboy.
It’s great for small spaces
When I made the switch to small-batch brewing, I had recently moved to a small house. We were a family of five living in an 1100 sq. ft. house. The kitchen was only large enough to fit one person comfortably. We had no basement access, which means we really had no storage. Convincing my wife to make room in our closets for all my gear and bottles was a lost cause from the beginning. I thought about brewing off-site, but that would mean I’d be gone for half-days on weekends, which is when my wife expects me to give her a break with the kids. So, I needed a third way. Small batch brewing was it. I can brew on a weeknight without it being much of an imposition. The beer ferments in 1-gallon jugs that fit on my countertop. My wife finds they look much cuter than my old 5-gallon carboy (score!). I usually have 2-3 going at any given time, and they take up little space.
It’s an easy way to start all-grain brewing
The beauty with small-batch brewing is that you can get going with all-grain from the beginning and build your confidence quickly. It’s so easy. Really easy. I’ve likened to telling friends that if they can bring water to boil or make chicken stock, they can make beer. And with small batch brewing, the concept is spot on. You can brew with the stock pot you already own.
You brew much more often
I now brew, on average, every two weeks. If it wasn’t for lack of storage in our small house, I’d brew beer every week. Because small batch brewing is quicker, and somewhat low-maintenance, brew days are not all encompassing like they were when I was brewing 5-gallon brews. I let the grains steep at the right temperature for an hour, which requires little, if any oversight. Strain, and bring to a boil, add hops carry on. Cool, strain, drain to a fermentor. Seal the carboy and we’re off. Throughout most of this process, I can do other things—usually work, since I’m brewing at night. It’s less encompassing, which means I brew more. Who doesn’t want to brew more often?
You can afford to experiment
It will happen. One day, you will brew a bad batch of beer. We’ve all done it. Every time it happens, it’s a learning moment. But that doesn’t make it any less painful when you see your hard work being poured down a drain! You can avoid tears before bedtime with small batch brewing though. If you’re brewing more often, and in smaller quantities, the pain will be minimal. This is obviously good for two reasons:
- You stay motivated, even when you produce a bad brew; and
- You can try crazy ideas, knowing that if they fail, you’re only losing 1 gallon of beer. (After three attempts, I still can’t make curry leaves work in my beer, but that’s not going to stop me from trying my hand a fourth time!)
And finally, you can get started with less equipment
You should see the number of times I get a surprised reaction when I tell people I brew beer in my kitchen. I think most people have this image of homebrewers camped out in the backyard or garage with a dozen burners, test tubes, buckets, and all sorts of gear that would make it impossible to brew beer as easily as you can make chicken stock.
And in a way, you can’t blame them. Your average 5-gallon starter kit will run you around $250. That includes a 5-8 gallon brew kettle, 6.5-gallon primary fermenter, 5 gallon glass carboy, hydrometer with sample tube, racking cane, rubber stopper or cap, siphon hose, 6.5 gallon bottling bucket, 50 12oz (355ml) bottles, bottle filler, bottle caps, and bottle capper. You could of course deck out your brew house some more, but those cover off your basics.
A 1-gallon starter kit, by comparison, will run you $50 or so. If you’ve never brewed beer before, and you’ve been wanting to give it a try without having to fork out a fortune on gear you’re not willing to commit to, than small batch brewing is the perfect way to get started. And once you get started, you may decide it’s the only way to go!
Nothing stops you from buying each of the items identified below separately, but many home brew shops sell starter kits for 1-gallon brewing that will give you just about everything you need to get started. If you’re in the U.S. Northern Brewer sells a kit for just under $70.
3. Equipment
My goal is to get you started without spending a fortune on gear.
At this point, you need to see if homebrewing is for you. No need to make a large investment until you know for sure. You can always upgrade your brewhouse piece by piece as you develop your craft, over time.
Let’s break this out by brew-step.
For the Mash and Boil
- Stock Pot. This will be your brew kettle. While our final batch size is 1 gallon, we’re actually going to need a pot that can handle 3 US gallons. Anything smaller and you may end up with wort all over your stovetop.
- Nylon Bag. If you want to keep things super easy, get yourself a nylon bag to put your grains when doing the mash (soaking). You then just take out the bag, let it drain a little, and then you’ve got a mess-free transition to the boil. Personally, I don’t mind using that a good ol’ fashion colander.
- Colander. If you don’t mind a little bit of extra work, you could use a colander instead of a nylon bag. You would drain your hot water bath through the colander to remove the grains and proceed with the boil.
- Thermometer. You’re going to need to take the temperature of the mash, as well as the wort when it’s time to pitch your yeast. I highly recommend a digital thermometer to give you precise readings, quickly.
- Digital Scale. You’re going to need to mix the right ratios of milled grains, hops etc. I don’t know how I’d get by without my digital scale.
For Fermentation
- StarSan Sanitizer. We’re going to cover sanitation later, but this is an absolute must. You’ll use it to sanitize any and all equipment that comes in contact with your wort once you’ve removed it from the boil. StarSan is my favorite sanitizer – it’s food-grade, which means it’s safe for people and the environment. It’s flavourless, so it won’t taint your beer. And there’s no need to soak your tools for an extended period of time, it sanitizes almost instantly (in 1-2 minutes) and doesn’t need to be rinsed off.
- One 1-gallon carboy. This will be your fermentation vessel. I prefer a glass carboy because it’s easier to maintain than plastic, and I can see how healthy my beer is at anytime without having to pry off the airlock.
- Funnel: the carboy has a narrow opening. This will make your life much easier.
- Plastic screwcap to hold your airlock. I used to use a rubber stopper, but after one too many pop-offs, I made the switch to screw caps. Your airlock is sure to stay in place.
- 1 airlock. You’ll add sanitizer to your airlock, which will keep a seal on the carboy and let carbon dioxide escape to prevent your carboy from exploding.
- 1 blow-off tube. To be extra safe, you could also get a blow-off tube, which you’ll use in place of the airlock for the first 2-3 days of fermentation, in case you get a super vigourous boil. If you do, and you don’t have a blow-off tube, you may end up an exploding carboy, or a big mess on your counter. Either way, I’ve been there, and it’s not fun!
For Bottling
- 1 mini auto-siphon. You’ll use the siphon (which you’ll connect to a hose), to siphon beer from the carboy into a bottling bucket. The mini-siphon is sized for 1-gallon jugs, which is perfect for our needs.
- 1 3ft siphon hose. You’ll connect this to the auto-siphon when transferring the fermented wort to the bottling bucket, and then connect the other end to the bottle filler when you transfer the wort to bottles.
- 1 bottle filler. This handy device will help you prevent unnecessary spillage of beer on bottling day and is also sized to ensure you do not overfill your bottles.
- 12 pry-off bottles (340ml bottles). This is the perfect excuse you needed to buy two six packs of your favourite beer (so long as they are pry-off bottles!). Give each bottle a thorough rinse immediately after you pour out the beer and set aside for bottling day. If you’d rather buy some bottles, than I strongly recommend you buy the swing-top variety, which would mean you could skip the next item on this list.
- 1 bottle capper. This handy device will help you cap your bottles.
- 12 bottle caps. And finally, you’ll need fresh caps to finish things off, unless you’re using swing-top bottles.
Assuming you already own a stock pot and you’ll use recycled bottles, you can get all of the above for 750. If you’re in the US, I’d recommend getting this starter kit from Northern Brewer. Canadians, I highly recommend ordering your kit from Beer Grains. Of course, if you know of a good local brew shop, they can get you started.
4. Sanitizing
The one thing you can do to guarantee your beer doesn’t spoil: cleaning and sanitizing everything that touches it.
I confess, I was hesitant about writing a section strictly dedicated to this topic; it’s not exactly the sexiest thing to talk about. But until you get to a point where you’re experimenting with crazy ingredient combinations, the only thing that can truly ruin your beer is failure to keep everything that touches your beer clean and sanitized. Let’s review in greater detail.
Before you start getting any nightmares, let me alleviate any fears you may have about what would happen if you drank bad beer. It’s just that: bad-tasting beer. You’re not going to get botulism or any other scary-sounding foodborne health concern. There are no known toxic microorganisms that can survive in beer. It’s not like drinking spoiled milk or carrot juice gone bad. The worse that will happen is that your taste buds will be deeply offended that you put them through such torture. Bad beer won’t kill you, but it may make you sad.
As dry as this topic is, I do have some good news: Good sanitization is easy. You just need to be giving it constant thought when you’re making beer. There’s no need to stress out about this. If you can wash and scrub dishes, you’ll have no problems keeping your equipment clean.
Sanitizing your gear is nothing more than soaking, rinsing, or spraying your equipment before it touches the beer.
If you had fears of boiling every piece of equipment like Grandma did when she canned her pickled beets, there’s no need. It’s much easier than that! And lucky for us, we don’t have to rely on household ammonia or chlorine to do the trick (homebrew pioneers before us had only rudimentary options).
As I touched on in the last section, I highly recommend using StarSan. StarSan is definitely the most popular sanitizer, and is used by the pros. Not only is it flavorless, odorless and requires no rinsing, it foams easily. And that’s a good thing. The foaming action gets the sanitizer into all the possible cracks and crevices, finding and killing any unwanted microorganisms. But as with all good things, use in moderation. Too much foam and you’ll find things get a little unruly. But even so, it’s flavourless, so if you find yourself with equipment sporting a little too much foam, relax, it won’t ruin the taste of your beer.
There’s only one rule to remember: if my beer is going to come in contact with this thing, it needs to be sanitized.
With that said, let’s take a look at the most common items we’ll need to keep clean:
- Plastic equipment: your auto-siphon, hoses, (and plastic fermenters if you’re using them) should be clean, free of stains, and free of scratches. Scratches can harbour unwanted bacteria. If you find your beer is starting to develop unwanted funky flavour profiles, throw out the scratched or stained gear. When it comes to hoses, I tend to get a new one after 10 brews.
- Glass carboys and bottles: the only way to keep these clean is to clean them as soon as you’ve emptied them. Get lazy and you’ll end up with sediment that’s nearly impossible to remove. So, after you’ve transferred your beer from the carboy to the bottles, give that carboy a thorough clean right away. You’ll likely need a carboy brush (cheap wire brush with hard bristles that you can twist into whatever shape it takes to clean out any sediment stuck to the sides of the carboy). The same applies to your bottles. Assuming you plan to reuse them for bottling your next batch, give it a good rinse after you’ve poured out the good stuff. Take my word, if you tell yourself “oh, I’ll just rinse them later,” you’ll end up cursing yourself on bottling day.
- Spoons. I recommend keeping your kitchen’s wooden spoon for your family’s secret risotto recipe. Now, technically, so long as your wort is above 71C (160F) it’s safe and can tolerate a wooden spoon. In fact, many brewers use wooden paddles to brew their beer. But their paddles are used for that one and only purpose. Your kitchen’s wooden spoon has been in contact with countless types of foods and bacteria that could still be calling that spoon home. I personally find a stainless steel spoon easier to sanitize and keep thoroughly clean.
- Your hands. Keep them clean at all times once the wort has been removed from the boil. You don’t want to touch the beer with your hands, but if it happens by accident, you’ll sleep better at night if your hands were clean during contact.
- The countertop: The best chefs in the world keep their kitchens obsessively spotless. I recommend you take a similar approach. Brew on a clean surface. It’ll put you in the right mindset.
We’ll cover specific step-by-step sanitation as we get into the brewing process in the coming chapters.
If you want to explore further, check out my guide on how to clean and sanitize homebrew equipment.
5. Brew Day!
This is where the rubber hits the road. By now, you know what goes in a good beer, the gear you need to get started, and the basics of sanitization. We also talked about the benefits of small-batch brewing. Now, let’s get brewing!
Find Time
First of all, you’ll need to set aside three hours for brew day. This is how much time we’ll need to mash the grains, boil the wort, cool it, and transfer it to a fermenter. When you first start brewing, you’ll want to be in the kitchen to keep a close eye on everything. With time and experience, you’ll eventually get to a point where, if you need to, or want to, you can do other things as you’re brewing. But for now, you’re going to want make sure you set enough time aside to you don’t feel rushed.
Review yeast instructions
Not every yeast behaves the same way. Read the package or vial’s instructions at least the day before you plan to brew…you may need to warm the yeast to room temperature overnight.
Clean your gear
Make sure the following items have been scrubbed clean and rinsed of soap residue before you get started.
- Brew kettle
- Stirring spoon
- Colander
- Carboy
The Mash
Before you get to this point, you will have purchased and milled the grains called for your recipe. If you’re using a nylon bag, transfer these grains to the bag and set aside until the water is at the right temperature. If you’re using a colander, you’ll just add the grains directly to the water.
- Bring your water to the right temperature, as prescribed in the recipe. Add your grains and give everything a good stir until the whole thing looks a bit like oatmeal. Shut off the heat, cover with a lid, and let it steep for an hour. The kitchen will start to smell of roasted cereal. It’s quite nice.
- Then you need to “mash out.” You put the heat back on, and raise the temperature of the whole solution, as prescribed by the recipe, and keep stirring for 10 minutes.
- Remove the grains and prepare for the boil. If you’re using a bag, just pull it out and let it drip near-dry above the pot. If you’re using a colander, strain to remove the grains, preserving the wort, which you’ll add back to the pot.
The Boil
- Start the boil by bringing your wort up to a boil. Once boiling, start your timer (60 minutes in most cases; sometimes you may boil for 90 minutes, depending on the recipe). Add your bittering hops, as prescribed by the recipe.
- Meanwhile, prepare your sanitizer solution.
- Just before the boil is complete, make an ice batch in your kitchen sink. Load it up with as much ice and cold water as you can. Once the boil is over, transfer your pot to the sink to cool your wort to pitching temperature, as prescribed on the yeast pack. Remember to sanitize your thermometer every time you check the temperature.
- Meanwhile, thoroughly clean and sanitize your carboy, screw cap, airlock, funnel, and strainer/colander. You want everything to be ready to go once the wort is at the right temperature. This also means you need to sanitize the yeast pack and the scissors if you’re using dry yeast.
- Once the wort is at pitching temperature, transfer it to the carboy by passing it through a strainer overtop the funnel. You’re doing this to catch as much of the “trub” as possible (hop and malt sludge that looks kind of gross. Don’t worry, it’s completely normal!). Often, you’ll discover you have a little bit more than a gallon of wort. That’s not an excuse to fill the carboy right up to the very top. Do not fill it higher than the one gallon mark, which on just about every carboy is easy to spot. There’s all-caps “ONE GALLON” raised lettering near the top of the carboy. Fill to the point where the wort reaches the bottom of those letters. As you’ll soon see, the yeast needs some room at the top of the carboy to do it’s thing.
- Now, you need aerate the wort. This is the only time mixing your wort (oxidizing it) is good. After you pitch the yeast and set the carboy in a safe place to ferment. you want to keep your beer as still as possible. To aerate the wort, cover the fermenter with a screw cap and gently rock the carboy back and forth for a few minutes to mix in some air.
- Pitch (add) the yeast! Use sanitized scissors to cut open the package (if using dry yeast) and pour in only HALF the yeast. There is such a thing as pitching too much yeast. Half the pack is MORE than enough yeast. Toss out the rest, or use it to make bread. But do not ever use it to make a second batch of beer.
- Seal the carboy by filling the airlock with sanitizer, but try not to exceed the max line. Fit it in the screw cap. Move the carboy to a dark spot, free of the home’s daily commotion for at least 14 days (but ideally not more than 21).
If this seems a bit overwhelming, don’t worry, I created this detailed No-Stress Brew Day Checklist to guide you through brew day.
Give yourself a pat on the back. You’ve just brewed your first beer! It may not look like much now, but that liquid gold is going to undergo a lot of (vigorous) change in the next 24-72 hours and gradually over the next 14 days. We’ll talk about that in greater detail in the next section.
A final note: I should point out that to keep your first brew day stress-free and easy-going, I omitted an optional step: taking a hydrometer reading before you add the yeast to measure the wort’s original gravity. Taking this measurement now, and then a second reading after fermentation lets us calculate the ABV (alcohol percentage) of our beer. If you’re interested in doing this with your first brew, read my blog post, “How to Use a Hydrometer to Measure Your Beer’s ABV.” But in all honesty, if you follow the instructions, you should hit the approximate ABV level identified in your recipe. And if you didn’t hit it on the mark, so what? Consider it your own unique brew. You will eventually want to take hydrometer readings as you advance in your craft, but for your very first batch, don’t stress about it.
6. The Magic of Fermentation
Now that your beer is in a cozy dark corner of the house, here’s what’s going to happen over the next 14 days.
Respiration
This process started when you pitched the yeast. This is why you had to aerate your wort. The yeast uses that oxygen to generate the requisite energy to reproduce and ferment. This will last about 4-8 hours. At this stage, no alcohol is produced. The yeast is producing water, flavours, and carbon dioxide.
Fermentation
From here on in, the yeast doesn’t need oxygen. During this stage, the yeast will reproduce until it hits the ideal population needed to work its magic. You’ll see the yeast suspended in the wort for about 3-7 days. This is a good thing. It means the yeast is converting sugar to alcohol, carbon dioxide, and all the flavours your wort need to taste like amazing beer. Once it’s done with this step, you’ll see what’s called “flocculation.” This usually means you’re about halfway through fermentation. It signals that the yeast is running out of food and is preparing to go dormant, settling to the bottom of your carboy.
Sedimentation
You’ll notice a bed of yeast forming at the bottom of the carboy. And that bed will grow thicker and thicker. At this stage, the yeast is also producing glycogen, which it keeps as an energy source should it get added to new wort. This is what allows many homebrewers and professional brewers to reuse the same yeast over and over to produce consistent flavours. We’re not going to worry about re-pitching this yeast, but know that when you get into more advanced brewing, this bed of yeast can do amazing things. With all good things, it does have limits. You don’t want to leave your beer sitting on this bed for too long. Over a period of time, the yeast cells will begin to deteriorate, imparting off-flavours to your beer. But again, no need to stress. We’re only leaving our beer in the carboy for 14 days, so we’re in the clear!
A quick note on fermentation temperatures
Each beer is slightly different, so you’ll want to follow the recipe’s guidelines for the ideal temperature to store your beer at. You should know, however, that the warmer the temperature of your beer at the start of fermentation, the faster the beer will begin to ferment. That might sound convenient, but if fermentation starts too quickly at too warm a temperature, you could increase the ester and diacetyl levels. In some beers, that’s fine, but in most, these flavour compounds can impart unwanted fruity flavours of pear or banana. If you store it at too cold a temperature, yeast activity may stop altogether. Seriously though, there’s no need to stress about this. Follow the recipe’s instructions for fermentation temperature and you’ll be in fine shape. And all you need is a cheap stick-on thermometer, so you never have to stick a thermometer into your beer as it ferments.
7. Bottling Your Homemade Craft Beer
Come bottling day, you will have proven to be a patient human being, waiting 14 days to get to this point. But to really test your will, you’re going to have to wait another 30 days before you can taste your masterpiece! (Although, most of us will cheat after a week or two to test one bottle and ensure everything’s on track).
By now you’re beer is fully fermented. You could start drinking it, but it’s missing a crucial element: bubbles! We need to carbonate the beer. Eventually, you may choose to invest in forced carbonation tools, but for now, we’re going to take the approach brewers used for ages, and an approach I’m still partial to: bottle conditioning.
We pretty much transfer our wort to a “bottling bucket” (which could be your stock pot) where it will get gently mixed with dissolved sugars before transferring that new solution to bottles. Once the bottles are sealed, the yeast will eat on the sugars to carbonate our beer in the bottle. It’s quite magical, actually. And the resulting beer has such a delicate, champagne-style bubble that will make the beer feel rather luxurious.
So let’s get to it! For this step, you’ll need:
- The auto-siphon, hose and bottle filler
- Bottle caps and bottle capper, if you’re not using swing-tops
- 1 dozen 12 oz (350ml) pry-off bottles
- Sanitizer
- A bottling bucket (your stock pot could do the trick, but eventually you may find it convenient to purchase a plastic bottling bucket from your favourite homebrew supplier.
- Sugar (about 17 grams)
- An extra set of hands, if you can. (Bribe them with beer!)
Get everything ready
- Move the carboy to the countertop, if it wasn’t already there. If the wort got lots of movement during transfer, let it sit so that any stirred-up yeast has a chance to re-settle.
- Sanitize everything that will come in contact with the beer: bottling bucket, auto-siphon, tubing, filler, bottles, and bottle caps.
Prepare the bottling bucket
- Dissolve the corn sugar (which you can get from your homebrew supplier), with just enough boiling water to dissolve the sugar. The amount of sugar will varry slightly from one recipe to another, but you’ll usually use around 0.60oz, or 17g of sugar. A very important note here: never exceed the recommended amount of sugar. If you put too much sugar in your bottles, you’ll end up with exploding bottles. No big deal if you’re off by a gram here or there, but don’t even think about doubling the recommended amount.
- Add the dissolved sugar solution to your sanitized bottling bucket.
Transfer the beer to the bottling bucket
- Fill your auto-siphon and hose with sanitizer. The auto-siphon makes this easy. Make sure the sanitizer solution is on the counter, place in the auto-siphon with the other end of the attached tube (which has your bottle filler attached) in a spare container on the floor. Give the auto-siphon two or three pumps, while also apply pressure on the bottle filler (this is where an extra set of hands helps) and watch the liquid fill up the tubes. Then it’s just a matter of moving that auto-siphon to the carboy (you’ll have to remove the airlock at this point) and submerging the auto-siphon. picture or video would be great here
- Transfer the solution to a spare container until the beer has completely replaced all the sanitizer in the tubes. Now you can place the end with the bottle filler in the bottling bucket, which should also be on the floor and gently transfer the beer from the carboy to the bucket. You want a quiet siphon. Try not to splash the beer around; you want to avoid adding bubbles (air) to the beer. Transfer all the liquid up and the point where it reaches the sediment. Leave the sediment in the carboy.
- Move the bottling bucket to the counter and siphon the beer quietly into each bottle. When the liquid gets to the very top of the bottle, remove the bottle filler, which will leave the perfect amount of headspace at the top of the bottle, which will be crucial in helping your beer condition well.
- Cover each bottle with the sanitized caps and cap ‘em into place.
- Store the bottles upright in a quiet, dark corner at temperatures between 65F (18.5C) and 75F (24C).
- Wait 30 days, if you can. If you’re way too curious (I can’t blame you!) try and hold out for 14 days. If you absolutely can’t wait, you can try after 7 days, but the beer really needs at least 14 days to condition.
- Once you’re ready to drink, chill it lightly, then drink it. Now, remember, because we bottle-conditioned this beer, there will be yeast sediment at the bottom of the bottle. So pour the beer our gently, making sure not to shake the beer, leaving behind that last little bit (½” or 1 cm) of beer, unless you enjoy the taste of yeast (it’s got vitamin B in it, so it’s good for you!)
Video: Review of the Entire Process
The good folks at Northern Brewer have put together a great video that outlines the brewing process. While the video deviates from our approach slightly (we’re using all-grain, a different sanitizer, and priming sugar instead of sugar drops), the bottling process is otherwise spot-on with what I’ve outlined above. For those of you who want to see how it’s done, check it out. This makes for a great review of all the steps we’ve talked about.
Congrats! You’re officially a home brewer! Feels pretty awesome, eh? I hope you enjoyed this guide. If you found this course to be helpful, if so, consider buying me a beer. It’s super quick and easy.
Of course, I want to continue to improve this guide, so if you have any comments, questions, or suggestions, I’m all ears!
Next Steps
Time to get brewing! Head on over to recipe section and pick an ale that interests you. Then head over to your local homebrew shop, or go online and get your gear and ingredients. Make that first brew, share it with friends and brew some more!
As you get brewing, feel free to send me your questions. Every question is an opportunity for me to write a new blog post or guide for fellow brewers so that BeerCraftr can continue to help new brewers get started making good beer at home.
Happy brewing!
Additional Resources
There’s a lot of comprehensive content out there if you want to take a deeper dive.
The go-to digital resource remains John Palmer’s “How to Brew“. He has graciously made the first version of the book completely available online, free of charge.
If you want to start with extract brewing instead of all-grain, the American HomeBrewer’s Association has a free guide for beginner’s with lots of photos to guide you along the way. It also has a helpful video series that could help you “see” a lot of what we’ve talked about here.
And finally, if you’re willing to pay, Craft Beer Magazine has a monthly membership learning portal with lots of videos and guides.