
Yes, you read that right. There’s such a thing as “yeast washing.” It goes by many names, including “yeast harvesting,” “yeast re-harvesting,” and “yeast rinsing.” Regardless of what you want to call it, one-gallon brewers can use this technique to brew with a wider variety of yeast strains, while saving money on liquid yeasts. I’ll walk you through how you can level-up your brewing skills with this technique. But first, let’s talk about why we’d want reuse that kind-of-gross-looking sludge at the bottom of our fermented wort.
Washing yeast lets you explore more (liquid) yeast styles
There’s absolutely nothing wrong with dry yeast. It’s reliable, easy to store, easy to use, has a long shelf live, and works perfectly fine to help you brew an amazing beer. In fact, if after reading this tutorial you have no interest in ever re-harvesting yeast, and you don’t care to splurge on more expensive liquid yeast, I’m going to recommend that you stick with dry yeast. You can make amazing beers with dry yeast.
But…
Now we live in a golden age of home brewing. We have access to an abundance of yeast strains, and the options continue to grow every year. With more homebrewers exploring the wonders of wild yeasts, the possibilities seem endless. Here’s the kicker though: most of these new strains are available in liquid form.
Reusing yeasts cuts down on costs
One of the drawbacks with brewing smaller batches of beer is that liquid yeasts are sold in quantities fit for five-gallon brewing, not one-gallon brewing. It can seem like such a waste to throw out all that extra yeast. Plus, it drives up your costs significantly.
Dry yeast is usually $3-$8 per packet. Liquid yeast ranges between $8 and $12. When you consider that we’re only getting 6-8 bottles of beer per batch, it’s expensive. I’ve brewed many batches of beer that cost me more than a six-pack of my local craft beer. By comparison, when I was a 5-gallon brewer, my costs were typically one third. When I was brewing larger batches, homebrewing was a huge cost saver, even when I splurged on expensive ingredients. When I switched to one-gallon brewing, I lost this efficiency. Then I started washing my yeast and my life changed forever (ok, perhaps a bit dramatic, but it was a pretty big deal!).
Yeast Washing/Harvesting 101
What is yeast washing/harvesting?
Instead of buying a new yeast every time you brew a new batch of beer, you wash the yeast that’s left in your fermenter and reuse it up to 10 times. Those are some serious savings! And the best part? It’s very easy to do. You don’t need to be an advanced brewer to wash and reuse yeast. Here’s how you do it:
1. Start by preparing sterile water
To make sterile water, bring 1 litre of water to boil for 15 minutes and then set it aside to cool to room temperature. Store the water in the fridge (in a sterilized jar) to speed things up. You can also do this days ahead and store the sterile water in the fridge. Just make sure to bring it up to room temperature before you use it.
2. Sterilize three jars
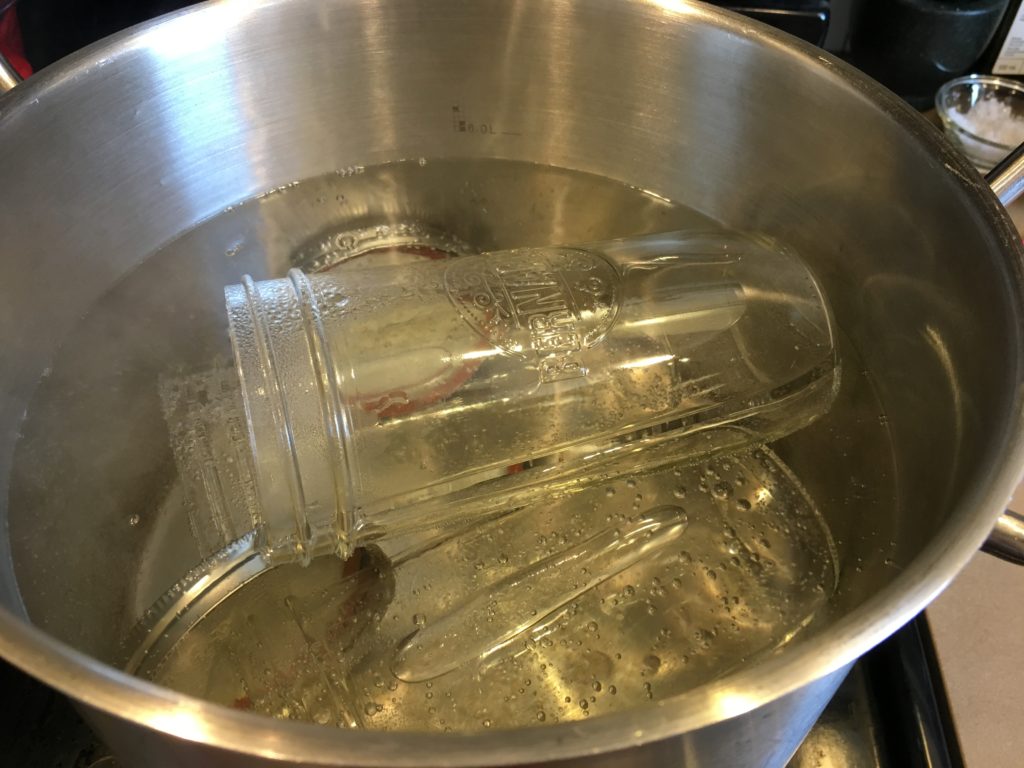
Boil three mason jars in water or immerse them in sanitizer solution. One jar needs to be large enough for all the slurry at the base of your fermenter plus four times as much water.
3. Sanitize the carboy’s rim
Just as in brewing, we want everything that touches the yeast to be perfectly sanitized so we can prevent the yeast from getting infected.
4. Shake up the yeast
Your fermenter contains a layer of thick trub—the hop bits and yeast sediment at the bottom of the fermenter. Swish the fermenter around to break up the trub. If the trub is thick and you need to loosen it, use some of the sterile water. Add a bit to the yeast and swish some more.
5. Transfer to a mason jar
Once you are done swirling, transfer the liquid to one of your sterilized mason jars and cover with the jar’s lid.

6. Let everything settle in the fridge for 20 minutes
We want the trub to separate from the yeast and fall to the bottom, while the yeast stays suspended in the liquid. The trub will appear as a dark brown layer, while the yeast will have a white colour. Note, this is true only if you have not filtered out your hops when you transferred your wort to the fermenter. If you did filter out the hops, you should have very little trub, and end up with a jar that looks more like this after 20 minutes:
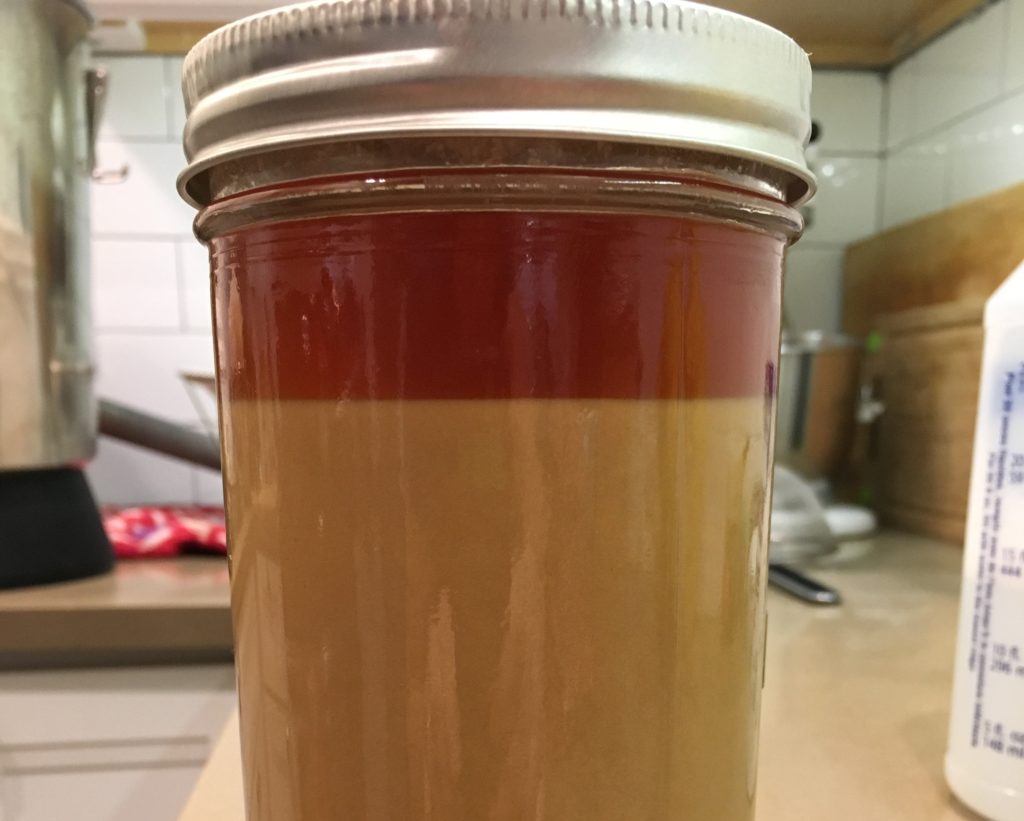
7. Check that all is clean, and transfer yeast again, if needed
And by this, I mean, verify how much trub you have in your jar. In my case, with the photo above, I had a very clean jar. From what I could tell, I had very little trub. However, if you find yourself with a brown layer at the bottom of your jar, you will want to remove the top white layer from it, as the white is the yeast you want to preserve. Your objective is to separate the healthy yeast from the trub. If you need to remove the yeast from the trub, transfer the liquid and white portion to another jar, swirl, and let settle for 30 more minutes. Assess again and do it a third time, if necessary.
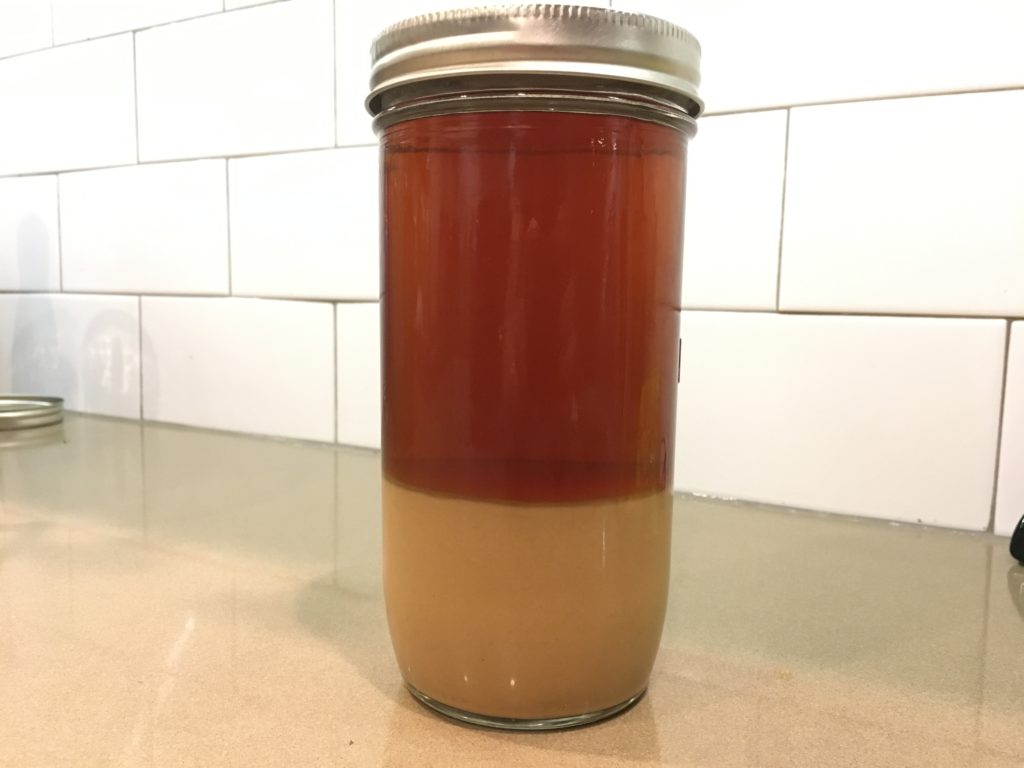
8. Cap the jar and store in the fridge for a few days
Over the next few days, the yeast will settle to the bottom of the jar, and the water will sit on top of it. In the photo below, you see the same jar from above, one week after I put it in the fridge.
How to reuse the washed yeast
On brew day, take the washed yeast out of the fridge and gently pour off the liquid, leaving the yeast behind. Swirl the yeast and then pitch it as you would a fresh vial or pack of yeast. Or better yet, make a yeast starter, especially if the yeast has been in your fridge for more than one week.
Also, I know I’m captain obvious here, but don’t forget to bring your yeast to pitching temperature before you use it.
How many times can I reuse washed yeast?
This is really a matter of personal preference and experience. Each brewer is different, but for the most part, the consensus seems to be 5-6 generations. Some people will go up to 10. Only you’ll know with time and experience what you’re comfortable with. However, there’s always the risk that with each new generation, some wild yeasts or bacteria will creep in.
If I’m in a pinch, can I use tap water instead of boiled water?
No. You need to use boiled water to keep everything sanitized. Just as importantly, you also need it because boiled water does not contain oxygen (at least at the same levels of tap water), and in this case, that’s a good thing. We want to avoid exposing the yeast to dissolved oxygen. Oxygen would cause the yeast to deplete their glycogen reserves and you’d have no viable yeast to pitch in your next brew. Which is just a fancy way of saying that by depriving yeast of oxygen, they stay dormant.
How long can I store the yeast?
So long as it’s in the fridge, you can store it for a month or two. You’ll know it’s time to throw it out when it turns brown like peanut butter. That means the yeast have pretty much died. A little bit of brown is no big deal, but if you can, try to use the yeast when it’s got that nice white/creamy colour (within one month).
What are some important things to watch out for?
Pay close attention to the colour and smell of the harvested yeast before you use it in your next batch. It’s a magical solution that over time gives your beer that distinct taste that you had a hand in making. But do take the time to analyze it—it should appear thick and creamy, have no “off” flavours and aromas, and be as free of trub as possible. If it smells off (sulfur or phenolic), it may have suffered from sanitation issues or some other type of stress. Regardless, if you have any doubts about the yeast’s health and you’re not ready to gamble a batch of beer away, don’t use it.
Should I only harvest neutral-flavoured yeast from light beers?
Sadly, not all yeasts take well to re-harvesting. You can easily do it with a low-gravity, low-hopped beer. Higher gravity beers or highly hopped beers sometimes stress the yeast in a way that’s good for that first batch, but that could have negative effects on future batches. It depends on whose giving the advice, but WYeast, which makes some of the best yeasts on the market recommends not harvesting yeast from beers with alcohol contents greater than 6.5%. I’ve personally stuck to this rule, but that shouldn’t stop you from trying to push the limits. That’s one of the perks of small batch brewing — you can take these kind of risks without having your heart broken if your little experiment fails.
How do I know if my yeast is healthy enough to be reharvested?
As a general rule, you’ll only want to reuse yeast from fermentations that have demonstrated normal signs. Makes sense right? If you saw abnormal activity the yeast might not be at its best and is at higher risk of not fermenting well the second time around.
This all sounds good, but how do I fit this into my bottling routine?
Good question! So, as with all things, the first time you do this, you’ll be a bit slow, but as you get the hang of it, it’ll become second-nature. All told, this is how bottling day looks like when you’re planning to harvest yeast:
- Before you start bottling, make sure you have sterile water on-hand, and that you have sterilized three jars.
- Rack the beer from the fermenter to the bottling bucket.
- Rack the beer from the bottling bucket to the bottles.
- In the fermenter, swirl the last bit of beer with the yeast cake to make a slurry. Pour the slurry into your sanitized jar.
- Let the jar settle in the fridge (20 minutes) while you clean up the carboy and all your bottling day equipment.
- Take out the jar from the fridge, pour the top layer (yeast and water/beer) into the second jar. Swirl the jar and let settle for 30 minutes. Continue cleaning all your other gear if you’re still not done.
- Pour into third jar, leaving trub behind.
- Store in the fridge for a few days. Try to use within a month.
If this sounds like too much effort, can I save costs in any other way?
Yes. Just stick to dry yeast. While the selection is not nearly as wide as liquid yeast, it has never been better. And every year, there are new strains available at your local home-brew shop or online. Some of my best beers have been made with dry yeast. and it is cheaper than the liquid varieties. But, if like me, you want to dabble with liquid yeast from time to time, and want to do so in a cost-effective manner, re-harvesting yeast is the way to go.
Are there any other resources to help me learn more?
Of course!
- Yeast Washing: Reusing your Yeast Brad Smith, founder and creator of BeerSmith provides a useful, high-level primer.
- Yeast Washing & Yeast Rinsing: What’s the Difference? The American Homebrewers Association explains the difference between yeast washing and yeast rinsing. Most of us use the terms interchangeably, but technically what I’ve outlined in this guide is yeast rinsing. Yeast washing involves using chemicals to reduce the amount of active bacteria in your slurry.
- Simple Yeast Ranching. John Palmer covers yeast washing/harvesting/ranching in his classic book, which has long been readily available online.
- Yeast Harvesting / Re-Pitching Written by WYeast, it’s more for commercial brewers, but it’s good reading nonetheless, especially if you want to geek out on all things yeast washing/harvesting.
Leave a Reply