Hazy IPA in a glass, next to an open bottle of beer

Tips for Bottle-Conditioning New England IPA

Attempt #1: Failing to treat the water properly

I’m the first to admit that I have struggled to make good New England IPA (NEIPA). My journey to making a good version of this popular and delicious style has been nothing short of frustrating. My first attempt was jinxed with a rookie mistake: I forgot to treat my water with Campden tablets.

I was so focused on making sure I had the right ratio of sulphate and calcium chloride (an important adjustment for this style), that I overlooked the more basic and important part of water chemistry: removing chloramine! I brewed a beer that had a wonderful tropical aroma and was convinced I had nailed my first attempt. Of course, if you have ever had beer made with chloramine, it’s disgusting. Careless mistake, I thought. Little did I know, this was the start of a long journey with this beer style.

Attempt #2: Oxidized beer (or so I thought)

I immediately shook off the embarrassment of the first batch, dumped this once-promising beer down the drain and walked back down to my local homebrew shop to get another round of ingredients.

The next attempt was better but still disappointing.

Yes, I remembered to treat the water properly but was thoroughly disappointed when I went to task my first bottle two weeks after bottling day. It tasted stale and had turned a grey colour.  With this being a hoppy style, I assumed I had done a poor job of bottling, clearly oxidizing the beer, right? (I would later discover that the colour change with NEIPA may not be the result of oxidation. We still don’t fully understand what causes this colour change).

I decided to get a couple of confidence-boosting brews under my belt to clear my mind before returning to NEIPA one month later.

Attempt #3: Conditioning Time

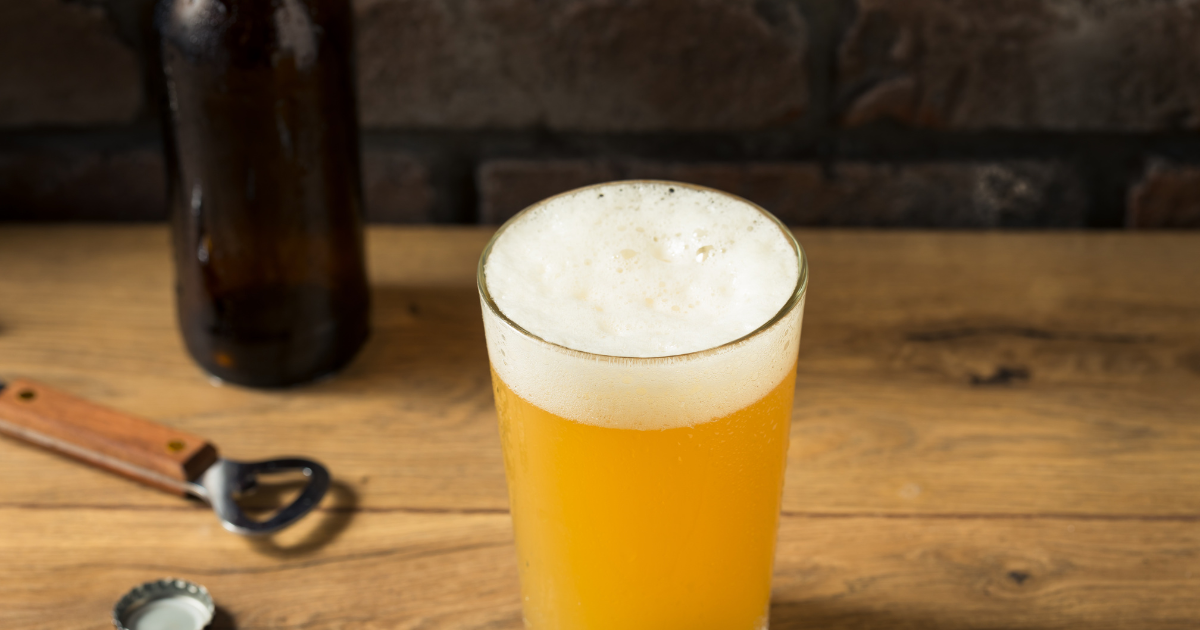
For this third batch (still thinking I was guilty of oxidizing the last batch), I paid obsessive detail to my bottling technique. I marked off the bottles that had a touch of splashing during the transfer from those that had a “clean”, splash-less, bubble-less intake of beer. Using the “clean” bottles for tasting and evaluation, I tasted my first bottle after one week. It was promising. The aroma was on point, and the colour had kept (mostly) orange, although not with the same level of brightness it had on bottling day.

One week later (two weeks after bottling day), I had my next tasting and was horrified.

The colour had darkened and turned a grey/purple colour, again!

It tasted mostly fine, but the colour was just unappetizing.

Maybe it was just this one bottle? I opened two more, and they suffered from the same colour defect.

This was frustrating.

Attempt #4: Expedited Conditioning Time

I gave it another go, but this time decided to break some long-held rules. If you know me well, you know that I advocate for waiting at least 14 days—if not 30 days—after bottling your beer to taste and evaluate it. I have found that most of my beers have tasted optimal after those 30 days. I always knew that hoppy beers need to be consumed quickly, while fresh, but I thought a 30-day window was still very fresh. Well, I was going to ditch that thinking for this next batch.

I once again paid special attention to water chemistry, and to my bottling techniques. But this time I:

  1. Conditioned for 5 days, tasted it, found it tasted pretty damn good, and then…
  2. Immediately transferred all my bottles to the fridge.
  3. Drank all the bottles within three weeks of bottling day.

And guess what? It worked!

It would appear that NEIPA responds differently to bottle conditioning than other styles, at least in a way that is visible to the naked eye. And it’s not just me. The good folks at Brülosophy have tested the impact of bottle conditioning vs. forced carbonation on this style, and have found some good and bad news.

The bad news? Bottle conditioning does have a noticeable impact on appearance. It wasn’t just me. You should read the findings of the experiment to see it with your own eyes.

The good news? In the experiment, participants could not detect a difference in flavour.

It would appear that time is our worst enemy when it comes to conditioning this beer. We need to drink it very quickly after bottling it if we want to avoid the purple/grey haze.

How to make good bottle-conditioned NEIPA

If you’re going to brew this style, pick one of my NEIPA recipes, and apply what I have learned through trial and error:

  1. Pay extra care on bottling day to minimize oxygen. More than you would for any other style. Make sure the hoses are properly fitted on the bottle filler and to the spigot or auto-siphon.
  2. Condition for 3-6 days at room temperature. The timing is dependent on your own taste, desired carbonation level, and how long you’re willing to wait before you slow the ageing process (next step).
  3. Taste a sample, and if you like it, chill the whole batch right away. This is the only way you can slow the ageing process and buy yourself some time (although not too much time).
  4. Drink within 2-3 weeks of chilling. This is not a style that ages well. It needs to be consumed as soon as it has been carbonated to your liking. The longer you wait, the more it will degrade.

For my next batch, I am going to experiment with filling some bottles up to the top, reducing the headspace. According to some enterprising home brewers, this trick has done wonders. I’ll update this guide accordingly, should I get any luck with that.

What are your tips? Have you experimented with this style? Share your findings with us so we can learn together.

Happy brewing!


Last Updated

in

, , ,

by

Comments

17 responses to “Tips for Bottle-Conditioning New England IPA”

  1. Greg

    Hey Joseph thanks for your tips. I would like to tackle a neipa in the future and this is helpful. I have a question about water if you can help me out; you mentioned achieving the right amount of gypsum and calcium chloride, how do you ACHive this and what is the proper ratio? Being i switched to 5 gallon batches Also I often used bottle water for my homebrew, however I do have a pur mineral water filter on my sink, is it necessary to treat with CAMpden tablets? Is it needed for bottle water?

    Thanks
    P.s. your scotch ale recipie worked out very well. I was impressed with myself and realized I could brew beer after all. Thanks again.

  2. Jerry

    I haven’t made NEIPA but we do make a bottle conditioned IPA and never had any of the problems, the first whole grain beer I ever made was a IPa and we still make the exact same one today, I do filter my water and treat it for correct PH and of course as with any home brewed beer we drink it within a month or less, we don’t use campden tablets or gypsum and calcium chloride but do use a PH stabilizer for all the water we use for our initial boil and whirlflock near the end of the boil as a finning agent, we have been doing this for more than two years now with good results

  3. Juan Figueroa

    I recently brewed the NEIPA for the first time and had not read the details about the hop schedule needing to be done after boil but before ice bath cool down. So, i did hop schedule during cool down and most of the pellets never dissolved. Should i increase the amount of hops for the two dry hop additions at eight and four days to make up for the error?

    1. I’d stick to the recommended hop amounts and see what the final beer tastes like. Then you can adjust the next batch based on your sensory assessment of the beer.

  4. Garrett

    Shoot! I just finished bottling my NEipa 1 minute before reading this. Based on how it went im expecting oxidation. Oh well, ill update next week when i test it, thanks for the tips!

  5. Riccardo

    Hi JosepH. Great article. I made a neipa and experienced a dramatic change in taste between the first bottles i opened and those i opEned just a few weeks later. Wish i had read this first

    1. Gus

      What bottles were best mate? The eArlier ones or later? Cheers

  6. Dustin Neff

    I found out when bottling a neipa fill the Bottle to the top then remove your bottle filler. Cap the bottle right away. Going from fermenter to bottling bucket make sure you dont Create ANy bubbles while transferring to the bucket. Hold the siphon on side of bucket so no bubbles are formed.

  7. zED

    hEY JOSEPH i’M JUST CURIOUS, DO YOU BELIEVE THIS APPLIES TO AMERICAN iPA’S AS WELL?

    1. Hi Zed, less so, unless the IPA you’re making has a lot of dry-hop additions. If you’re making a traditional American IPA (West Coast), or British IPA, you’ll want to drink quickly, but you don’t need to rush it, and you can use a proper headspace in your bottles.

  8. Rich

    Hi all, I made the 50/50 neipa with a few alterations and conditioned it for a month and chilled for 2 more weeks. It was bang on. I drank it within two weeks Though as it was only a 1 gallon recipe, so don’t know whether it would of degraded. Just done another one and I’ll try it after 7 days.

  9. ELevenFoxes

    There are many instances where oxYgen can Be introduced, and Thus degrade the quality of the batch – pretty quickly as reported by mAny. If one was to bottle this style, the best bet is to Minimize o2 During dry hopping – potentially purging the fermenter with cO2 during/after dry hopping. Its best to bottle directly from A primary conical fermenter which has been cold crashed under slight Co2 pressure. Dosing each individual bottles with the necessary amount of carbonation drops – purging bottle with co2 – filling bottle – purging headsPace – capping immediately x repeat x repeat x repeat x dream of kegging.

  10. James

    I used your FIFTY/fifty recipe and that all oxidised with the exception of one bottle which didn’t for some reason but all tasted pretty Great!!! I’ve since changed my bottling technique and as I use plastic Pet bottles, I fill them to the normal Level before squeezing them so that the beer level is at the lip before screwing the caps on. As the bottles carbonate, they push out the squished walls and worked out pretty well on my next attempt although there is still room for improvement. I recently got some campden tablets and also a bottling wand which will also probably help. I also used to shake my Bottles as this seemed a logical way to dissolve the brewing sugar but I no longer do this. Thanks for the great recipies and the tips, I’ll certainly be making the both of the NEIPA recipies again soon.

    1. Martin Cullwick

      Hi James. Just doing my first ever cloudy Ipa. Most will be put into a cornie, theN canned by a brewing mate, but i intend bottling a few, just to see the results.
      Had already to decided to use pet, bottles pUrged wHilst sTood in a 5 gallon bucket, also lightly purged. 1/2 Tsp sugar per bottle, filled with bottling wand, Then squeezed bottle approach. Will be interesting how they compare with the cans.

  11. Anthony McGann

    I am not shouting, but my cap locK key doesnt seem to function properly on this page

    has anyone had any luck with ascorbic acid in their fermenter, or bottling bucket?

    soem use it in conjunction with NA or K Meta

  12. Smurf

    Wow. I if I do try this one, It will have to be a really small bathch. I would be devastated if I ever lost a 5 gallon batch. Thanks for the article.

  13. 고양이 행동

    Tips for Bottle-Conditioning New England IPA – BeerCraftr

Leave a Reply

Your email address will not be published. Required fields are marked *

This site uses Akismet to reduce spam. Learn how your comment data is processed.